Mastering the Basics: How to Attach Buffing Wheel to Angle Grinder
Attaching a buffing wheel to an angle grinder is a straightforward task that can significantly improve your tool’s versatility. With a buffing wheel, your angle grinder can transition from cutting and grinding to polishing and shining various surfaces. This is especially handy for projects involving metal, wood, or other materials that need a smooth, reflective finish.
In this guide, we will teach you how to attach buffing wheel to angle grinder. Whether you’re a DIY enthusiast aiming to enhance your project finishes or a professional looking for a polished touch, this guide will help you maximize your angle grinder’s capabilities. Let’s begin with the detailed steps to attach your buffing wheel and enhance your tool’s performance.
.jpg)
Prepare Materials
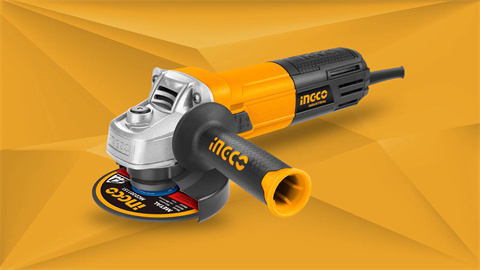
Before starting, gather all necessary materials to ensure a smooth and safe installation process. First, make sure you have a buffing wheel compatible with your angle grinder. Different wheels are designed for various applications, so double-check the specifications to match your project.
Inspect your angle grinder to ensure it is in good working condition, looking for signs of wear or damage like frayed cords or loose parts.
A well-maintained grinder will operate more efficiently and safely. Typically, angle grinders come with a specific wrench or spanner for changing accessories. If you’ve misplaced yours, an adjustable wrench will work. This tool is crucial for removing existing accessories and securing the buffing wheel. Finally, prioritize safety by wearing gloves to protect your hands, safety glasses to shield your eyes, and, if necessary, ear protection and a dust mask.
Remove Existing Accessories
.jpg)
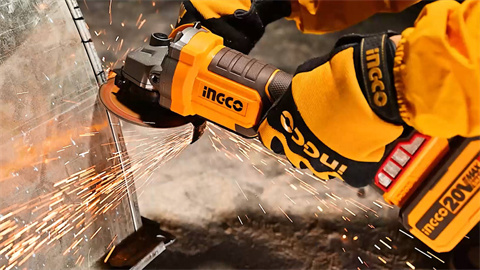
To begin, make sure the angle grinder is unplugged or the battery is removed to ensure safety. This is a critical step to prevent any accidental start-ups that could cause injury. Next, locate the wrench or spanner that typically comes with your angle grinder. If you don’t have the original tool, an adjustable wrench will work as well.
Use the wrench to loosen and remove any existing accessories attached to the grinder, such as a cutting or grinding disc. Be sure to hold the disc firmly while loosening the nut to prevent it from spinning. This step is essential to prepare the angle grinder for installing the buffing wheel, ensuring that the new accessory fits properly and operates safely. Once the existing accessory is removed, set it aside in a safe place for future use. Now, your angle grinder is ready for the next steps.
Install the Polishing Wheel
Place the buffing wheel onto the spindle of your angle grinder. Ensure the buffing wheel is aligned and positioned correctly according to the manufacturer’s instructions. This may involve checking the direction of rotation indicated on the wheel and matching it with the angle grinder’s rotation.
Additionally, verify that any spacers or adapters required for the buffing wheel are in place and securely positioned. Taking the time to carefully position the buffing wheel will help ensure optimal performance and safety when you start using the angle grinder. Once the buffing wheel is properly aligned, you can move on to the next step of securing it in place.
Secure the Polishing Wheel
Use the wrench or spanner to tighten the nut that holds the buffing wheel in place. Start by threading the nut onto the spindle by hand to ensure proper alignment. Then, use the wrench or spanner to gradually tighten the nut. Ensure the buffing wheel is secure to prevent vibrations or the wheel coming loose, which can be dangerous. Avoid over-tightening, as this can damage the buffing wheel or the angle grinder’s spindle.
A snug fit is sufficient. If your angle grinder has a spindle lock button, engage it while tightening the nut to prevent the spindle from turning. After tightening, spin the wheel by hand to ensure it moves smoothly and is centered correctly. This step ensures the wheel is properly installed and ready for use.
Check Whether the Installation Is Correct
Gently spin the wheel by hand to ensure it’s properly aligned and doesn’t wobble. If you notice any wobbling, loosen the nut slightly using your wrench or spanner, adjust the wheel's position on the spindle, and tighten the nut again without over-tightening.
Spin the wheel by hand once more to check for smooth, wobble-free rotation. Repeat this process until the wheel spins smoothly. Once the wheel spins smoothly, you can power up the angle grinder and begin your buffing tasks with confidence.
Connect the Power Supply
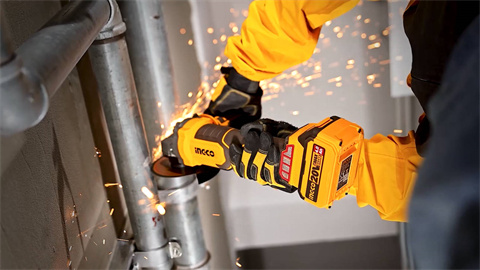
Once the wheel is secure and properly aligned, connect the angle grinder to its power source. For a corded model, ensure the power switch is off before plugging it into an outlet. Check that the cord is undamaged and positioned safely. For a cordless model, insert a fully charged battery, ensuring it clicks into place securely. Having an extra battery on hand can prevent interruptions.
After connecting to the power source, briefly test the grinder by turning it on to ensure the buffing wheel spins smoothly without unusual vibrations or noises. If everything is fine, you’re ready to begin your buffing tasks. This final check confirms all components are properly installed and the angle grinder is ready for use.
Conclusion
Learning how to attach buffing wheel to angle grinder can greatly expand the functionality of your tool, allowing you to achieve smooth, polished finishes on a variety of surfaces. By following these steps preparing your materials, removing existing accessories, installing and securing the buffing wheel, checking for proper alignment, and connecting to the power source you ensure a safe and efficient setup. With your buffing wheel correctly attached, your angle grinder is now ready to take on polishing tasks with ease and precision.
FAQ
What should I do if the polishing wheel wobbles or is unbalanced after installation?
If the wheel wobbles, turn off the grinder and unplug it. Loosen the nut, reposition the wheel, and tighten the nut again. Make sure the wheel is centered and secure. This ensures smooth operation and prevents potential hazards from an unbalanced wheel.
Can I use any type of polishing wheel with my angle grinder?
Not all polishing wheels are compatible with every angle grinder. Always check the manufacturer’s recommendations for both the angle grinder and the polishing wheel to ensure compatibility. Using incompatible parts can result in poor performance or damage to your tools and surfaces.
How often should I check and maintain my polishing wheel?
Regularly inspect the buffing wheel before each use. Look for signs of wear, damage, or imbalance. Replace the wheel if it shows significant wear or damage to maintain optimal performance and safety. Proper maintenance prolongs the life of your equipment and ensures safe operation.